Connect your modem/router to your NBN battery to have internet even during a power outage. This guide will show you how.
Ever been through a power outage and wished you still had internet? Tick.
Looked at the battery backed FTTP NBN boxes and wished your router had battery backup? Tick.
Started wondering "If i had battery backup for my router, i'd still have internet..." - Tick.
If you have the Coalitions' Multi Technology Mix FTTN NBN. Stop right here. YOU SHALL NOT PASS!
If you're lucky enough to have FTTP NBN with battery backup, you can probably have internet at all times too.
Tools Required
Wire Strippers
DC Volt Meter (A Multimeter)
Wire Cutters
Electrical Tape
20 minutes
and in my case, the biggest tool of them all, me.
Before We Get Started
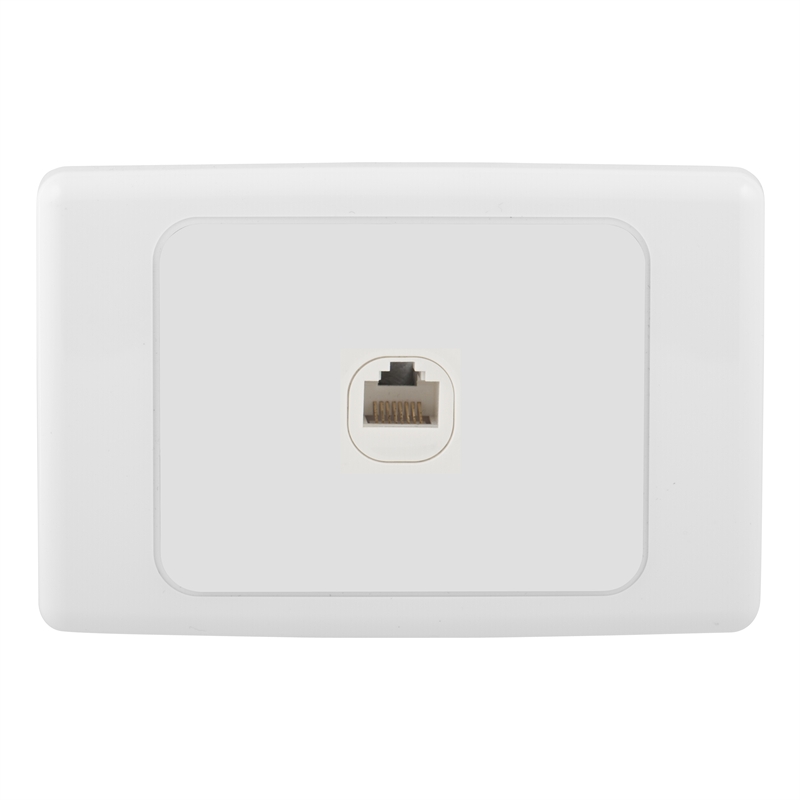
First of all, have a look at your router. The power socket should have something like "12v Xa" written on it. If it does, you're in luck and we can continue. If you can't find it, you may need to google your model of router and find its power specifications. As long the routers input voltage is 12 volts, you should be fine.
Turn off your router and disconnect the power to it.
Disconnect the power from the wall socket.
Open the battery backup unit cover and remove the battery from its holder. This will make it easier to work on.
Identify The Wires
Your routers' power cable is actually made up of two separate wires. It's now time to cut the cord and figure out which one is the positive and which is the negative. Separate the two wires and strip them. Make sure the bare wires DO NOT TOUCH!
Be VERY careful at this point! Use your volt meter on the volts DC mode and touch the leads to the wires. If you get a positive number, your red lead is on the positive wire. If you receive a negative number ie -12.XX then your red lead is on the negative wire.
Keeping enough to connect to the battery, cut the cord to the power adapter because your not going to need that anymore. You can of course skip this step but you'll have to be VERY diligent about keeping the power pack disconnected. Who knows what it'll do to your router or the NBM equiment if you do.
Be VERY careful at this point! Strip a small section of wire from each of the leads. A wire stripper like the one above will make this task really easy without damaging or cutting the existing wires. Always try to stagger your wire connections so you don't end up with a lump of tape in one area. They're also less likely touch each other.
Connecting Your Router To Battery Backup
Now you know which lead is your positive and which is your negative, you'll be able to connect the positive wire to the positive wire on the NBN battery and the negative wire to the negative wire connected to the NBN battery. Wrap the connections in electrical tape and your done.
The Moment Of Truth
Connect the power to the router and turn on your router. If your connections are solid, your router should turn on and power up running directly off the battery.
The next time you have a power outage, your router will still be online. By the way, the entire time i've been writing this article, i've been running off the NBN battery!
Disclaimer
The Ignorant IT guy takes no responsibility for any damage you cause to your equipment, NBN Co equipment or yourself. Don't come crying to me if your shit blows up or you zap yourself.
Will NBN Co allow this kind of setup? Probably not...
To most, the Australian National Broadband Network (NBN) is an unnecessary burden on the economy dreamt up by self serving politicians trying to win votes. Some of those same people also believe the NBN will only be useful to those who download illegal content or watch porn.
In this two part article, we're going to talk about how the NBN will affect you even if you oppose the project. We'll also discuss the key differences between Fibre To The Premise (FTTP) NBN and Fibre To The Node (FTTN) NBN. Finally, we'll look at a couple of real world use cases that you probably weren't aware of but will damn sure want to take advantage of. All with the typical IITG spin that will make this article just a little less shit.
The politically bias among us will no doubt cry one way or another but it's important to remember one thing; i hate all political parties equally. Yes, even yours.
What Is The NBN?
In a nutshell it's high (or in some cases highER) speed internet for all. The kind of internet which can be easily upgraded at relatively low cost to the taxpayer and has a longer shelf life than our existing forms of fixed broadband such as copper or cable.
The coalition stated that their NBN will be delivered quicker and cheaper than the now redundant labor NBN. It makes you wonder why we don't build more government projects with that mentality.
Roads can be delivered quicker and cheaper if we only use dirt.
Trains and buses can be delivered quicker and cheaper without seats.
Hospitals beds can be delivered quicker and cheaper if patients sleep on the floor.
Exotic dancers can... ummm... well, you get my point.
Connecting To The NBN. Will It Be Easier?
When you move into a new home, its often a mission to not only locate the correct wall socket but also verify whether the router and cable from your old house will work in your new house. When it doesn't, its off to the shops to buy the necessary cable/converter. Given the time wasting nature of the exercise i expect complaints laden with plenty of expletives thrown in for good measure. Unfortunately for some, this process will not change under the existing FTTN rollout.
We've all had to look for at least one of these at least once in our lives
FTTP on the other hand leaves you with a gray box in your home with an RJ45 jack waiting for your router to be plugged into it. Simply plug in an appropriate router and your done.
Find this pair of boxes somewhere in your house or garage and.....
Aim your cable for that port and you can't really go wrong.
Yeah, you heard me! no configuration, no username or passwords and no fancy settings to deal with. We've gone from having to deal with a telephone cable, adapter, inline filters etc to buying one RJ45 cable! ONE CABLE! The next time you move to another FTTP home, you'll know to look for and what to do.
How Much Speed Do I Really Need?
Before we can review how much speed is truly necessary, it's important for us to define how much each technology is capable of delivering.
Both FTTN and FTTP are capable of delivering 100 Mbps of download bandwidth. However, in a University of Melbourne study titled Broadband Facts, Fiction and Urban Myths, Figure 6 shows how quickly FTTN speeds deteriorate based on your cabled distance from the node. This explains why it must have been important for the coalition to reassure the public that they are "absolutely confident that 25 megs is going to be enough". It has to be or else they're going to be in trouble.
At 34:53 Tony Abbott tells YOU how many megabits per second YOU need.
FTTP on the other hand does not have this limitation. 100 Mbps download (and eventually 1000 Mbps) is achievable as long as you have FTTP in the first place. In a recent news.com.au article it has also been the deciding factor for one particular couple who work from home. Should the couple move again they agreed they will favour locations with FTTP.
With the car manufacturing industry faltering in South Australia. The SA state government have decided they will aim to create a 10Gb or 10,000 Mbps city which they hope will attract businesses, residents and knowledge economies. Let's be honest, if you're a Netflix or an Apple Computer Inc, a 10Gb city with a more affordable property market starts to look VERY appealing. Opening an office or datacenter isn't the only reason, it's all those potential customers with super fast internet who you'll want to sign up to your latest streaming service.
Whichever way you slice it, the internet of tomorrow is going to need to be capable of delivering multiple Full HD 1080p streams (5 - 9 Mbps per stream) and the odd 4K video stream (requires >25 Mbps per stream), web browser traffic (2 - 3 Mbps) and downloads (everyone downloads something!) to the majority of households in Australia. Compare this to today's paltry 24 megabit per second maximum theoretical speed of ADSL2+ quoted by EVERY internet service provider in Australia. The speed that's only really possible if your house is the same distance from the exchange as the average length of a pubic hair.
What About Wireless?
With 4G networks becoming faster than some peoples home internet connection and 5G on the way, it's totally understandable to think that wireless is the way of the future and number one contender to replacing fibre. Let's start by breaking down wireless into terms everyone can understand to see whether it really is better than fibre.
There can be multiple highways (3G highway, 4G highway, 5G highway etc) run by your mobile carrier (Vodafone, Optus etc). Your phone will try to connect to the fastest highway it can but your mobile carrier will dictate
Where you can enter the highway (mobile towers)
The maximum speed limit you can travel at
Number of lanes you can use (radio frequency spectrum)
Just like a normal highway, there are many more users during peak hour so you can't always travel at or close to the maximum speed. Also, what happens when others find out your highway performs better? They upgrade their mobile device and/or change carrier and suddenly there's more congestion and traffic begins to move slower and slower. Suddenly your seeing speeds of only a few Mbps! Where did the other 90 something megabit? Never forget that maximum theoretical speeds are pretty useless in the real world. Japan's NTT breaks fibre optic data speed record setting a maximum throughput rate of 1 Pbps or 125,000,000 Mbps.
Finally, the faster the highway, the closer you need to be to its entrance in order to use it. Don't forget that obstructions like walls etc will essentially move you further away from the entrance and force you to use a highway with less lanes and a lower speed limit.
This is what a Wireless NBN would probably look like if some have their way
Figure 12 in Broadband Facts, Fiction and Urban Myths shows fibre capable of speeds 10,000 times greater than the entire radio spectrum. What the graph doesn't tell you is that speed can be allocated to a single user. Imagine having a highway that's completely dedicated to you and only you and now your starting to see the power of fibre.
As we move closer towards an "internet of things" where more things are connected to the internet, it's likely we'll still see congestion and interference. Also, with relatively low bandwidth quotas, and quite expensive rates if you exceed them, I'm not confident it will be the silver bullet for those who champion wireless as the technology of the future.
For some reason i felt like writing this one. Below are 10 April fools jokes you can play on your fellow IT staff... because... why not? They're not in any particular order. Actually, that's not true. They're in the order i wrote them.
10. Swapping Keys on the Keyboard
Make their lives a little more difficult by swapping keys that are side by side. Swapping the "n" and "m" key are quite good as well as the "u" and "i" keys.
Don't swap keys like the QWERTY keys or the sequenced keys like 1 to 0 etc and you'll be fine. With any luck they'll lock an account and won't know why.
9. Turn it up LOUD!
If they tend to walk away with their computer unlocked, turn all of the volume sliders up on their PC. To send it over the top, turn their volume up on their speakers. Don't turn the volume up loud enough that you can hear the speakers without anything playing.
The next time they get an alert, it'll probably scare them half to death.
8. Rotate Their Desktop
This one is just plain annoying and that's what makes it funny. Open their display settings and rotate their desktops into portrait mode (or landscape if they're using portrait).
Keep your phone handy because it's likely they'll rotate their head to try and fix it because it's less of a pain in the ass than rotating their monitors.
If you want to get them back, you can do what i did and rotate your monitor(s) and leave it like that.... FOREVER. hahaha reverse BURN!
7. Fake Blue Screen of Death
Go here (on their computer), follow the instructions and thank me later.
6. Wireless Keyboard
Plug in a wireless transceiver into their computer and you can use your wireless keyboard while they're using their own keyboard. Imagine watching them trying to type their password while your pressing an extra key in the background. Randomly open windows explorer etc using shortcuts. Hours of fun for everyone! except the person being pranked.
5. Tape The Bottom Of The Mouse
Place some tape on the bottom of the mouse and watch as they're unable to move the cursor on the screen. If your the IT guy, prepare a second mouse as well.
When they inevitably ask you for help, you can give them the replacement mouse. Replace their current mouse with the mouse you prepared earlier and watch the confusion that unfolds. When they come back for help again, tell them to restart their computer.
4. Steal Their Speakers
Someone did this to me once. They disconnected my speakers and ran an extension through the wall (Yes, through the wall) and into their computer. Since we were both doing the same work we're used to hearing certain sounds during certain operations. But when you start hearing those sounds, when your not doing anything at all, you'll start investigating and spend hours trying to figure it out.
You can also start playing music through their speakers as well but it'll be really obvious that something is up.
3. Disconnect The Phone
Disconnect the phone handset from the back of their phone. They'll be able to answer the phone but won't be able to hear or speak to the other person on the other end of the call.
2. Tape an Air Horn Under Their Seat
Grab an air horn and some duct tape. tape the air horn under their seat. When they sit down, they'll jump straight up again.
1. Cover their Desk
Aluminium (or Aluminum) foil, cling wrap, post it notes hell, even wrapping paper can be used to cover someones desk. Cover everything in sight individually. Trust me, it'll look awesome when it's done.
Since we now know what changes we want to make and how to measure their effectiveness, in this episode we'll cover blanking panels, insulation and thermal containment.
Blanking Panels
Blanking panels are known to many as being ineffective, expensive and made of materials that conduct heat really well like, oh i don't know, STEEL! So if that's the case, why would anyone want to use them? While APC, Panduit etc both sell blanking panels in various sizes/quantities and yes, I've used them in the past, I don't like use them anymore for what should be fairly obvious reasons by now.
I was put onto the following company I'm about to mention and since then i almost exclusively recommend plastic blanking panels like those offered by Eziblank. They come in 8 RU sections with the ability to break them apart into a total of 8 individual 1 RU panels.
Almost all blanking panel manufacturers offer tool-less installation and Eziblank is no different. You'll be done and dusted fitting them to a rack in only a couple of minutes.
The Eziblank panels are significantly less expensive than some of the name brand blanking panels with one box of panels able to cover up to 60RU of space! At just over $100 USD a box they are seriously good value.
So far we've talked about some of the benefits in using blanking panels but the main reason you need them, the main reason why you want these in your life is because they help make sure cold air flows from the front of the rack, through a heat load (like a server) and out the rear of the rack. Air that doesn't pass through a heat load is wasted air that will continue to cost you money in energy bills until the end of time itself. Save yourself thousands tomorrow by spending a few hundred today.
Insulation
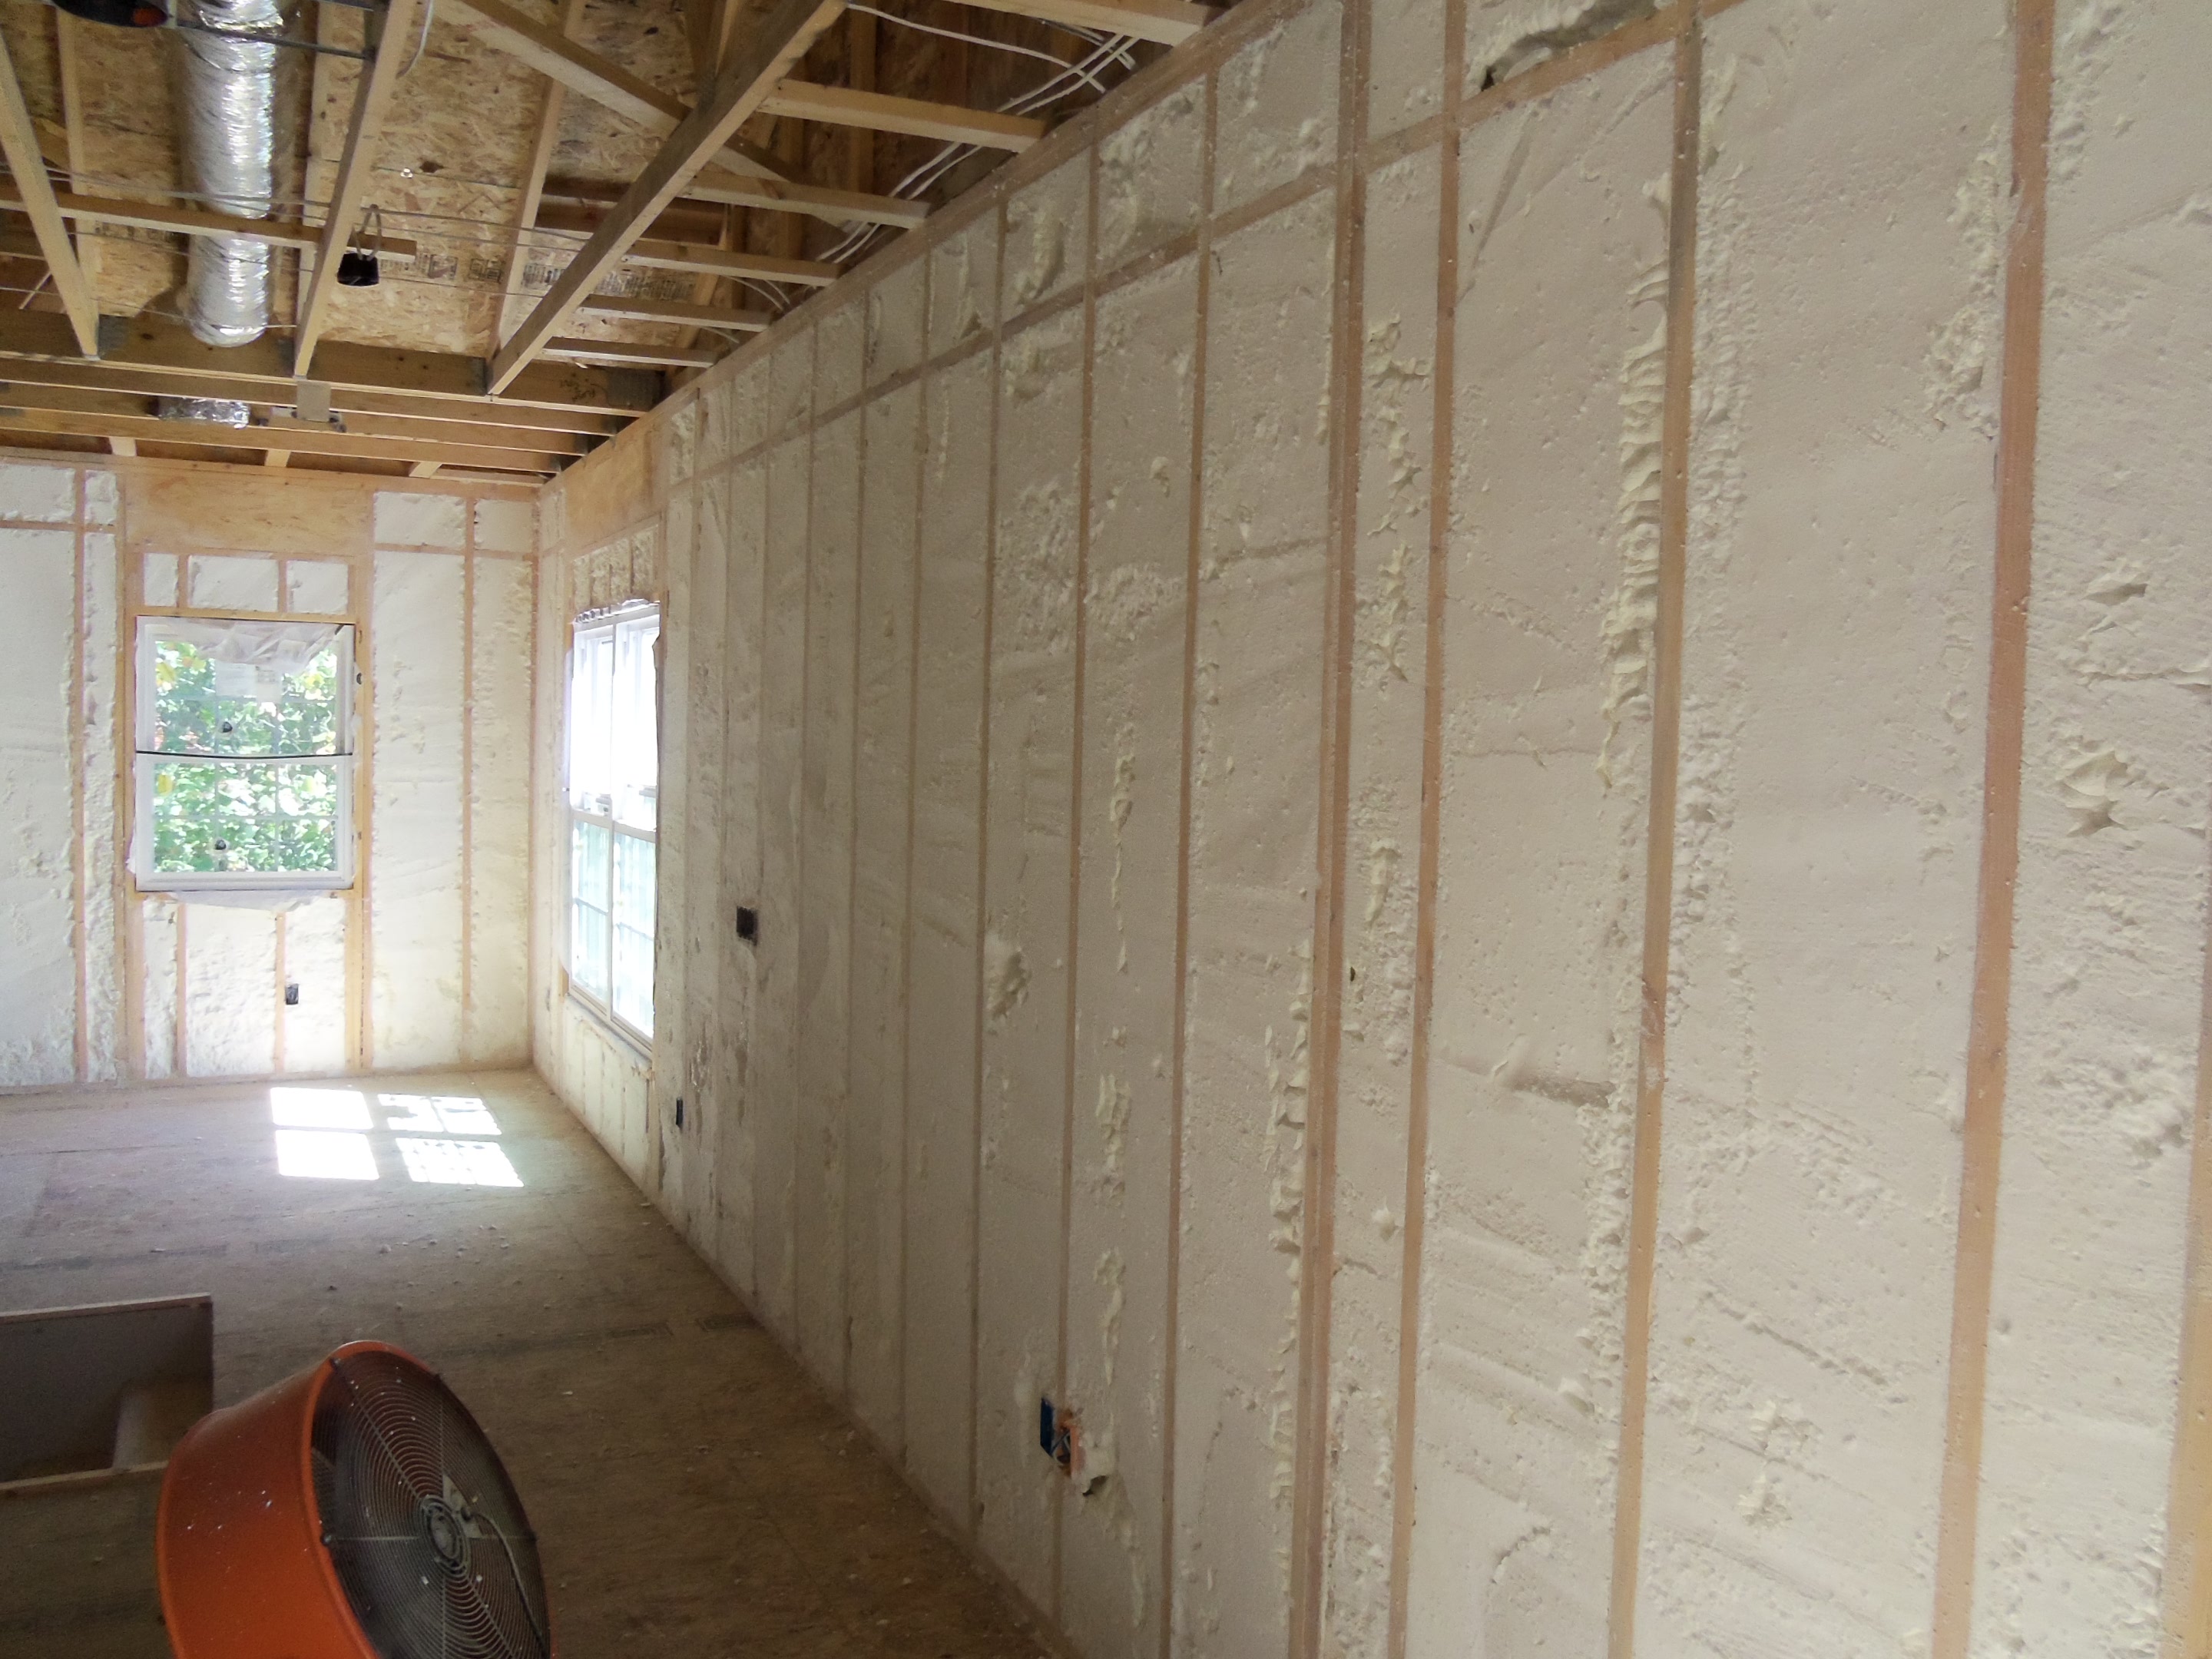
Sometimes when these rooms are built, noise transfer and thermal insulation aren't even topics that are either considered and/or covered. It's usually assumed that because the room is meant to house servers, there should be no need to worry about it. Wrong!
So what can we do to save us a few dollars on our energy bills? Well to be honest, it's exactly the same as a regular room in your home or office. Everything we look at here and every product we use can be re-used outside of the server room and is probably available from your local home improvement store. If you're lucky, you may be able to use excess materials from elsewhere on the site and cut your costs down to almost zero.
Foam Weather Stripping
Yep, that's what a roll of tape looks like...
Foam weather stripping come in a variety of different widths and lengths. By using them you can seal around doors and windows etc or seal gaps in racks or between racks. Noise transfer to other rooms can be an issue as well that will make everyone outside of IT, hate IT. As an added bonus of using foam insulation tape etc, you'll also be reducing noise transfer between the two areas.
Also available is foam (for lack of a better word) cord in various lengths and diameters. If you have windows that open, you can cut this stuff to length and jam it in the window tracks. The window may not open until removed, but it's a minor inconvenience when compared to the energy savings.
Bat vs Blown vs Foam
It sounds like an alternate version of scissor, paper, rock doesn't it? But we're talking about is insulation inside your walls and ceiling. You could be wondering how this even relates to airflow management? Well, if you have any gaps or holes in your walls (or ceiling), it's likely that your losing valuable cold air to an outside room.
You can use either batt or spray foam insulation in the walls but here's the thing... I'm not sure it makes much sense to use it in the entire room. The rear area behind your server racks doesn't need it because we don't really care about keeping the heat in. I will probably have to return to this statement once i'm able to do some testing.
The ceiling on the other hand can use one or more of the options available. It really just depends on your budget. Focus on the area's above the front of the server racks and you should be able to ensure that the cold air stays inside the room and the hot air outside the room doesn't rear its ugly head within the room.
Thermal Containment
Modern servers draw cold air in from the front, use barriers/ducts to direct the airflow over the components that need to be cooled and exhaust the hot air out the rear. By doing so, the servers make efficient use of the airflow available.
You might be thinking "why don't we do this in our server room?". Well, time and cost are normally a factor but it might also be difficult to sell it to management if you already have a server room that "just works". So if it's difficult to sell the idea of thermal containment, you might be able to slap together a proof of concept for relatively little cost (sometimes free) that will hopefully drive the point home.
Thermal Containment - Proof of Concept
Your going to need some paint sheets or a few shower curtains etc whichever one is cheaper and easier to get your hands on. You'll also need a roll of duct tape, something to cut the tape into strips, a ladder and probably a couple of hours to spare.
You're aiming for something like this, but on the cheap!
At the front of your server racks, you'll need to fill in the gap above them. Use the heavier sheets here. They generally won't have to cover as much area so weight shouldn't be an issue. Tape the sheets to the ceiling and let em hang. Use tape every metre or so and overlap with extra pieces of tape as necessary to make sure the sheets stay there.
For larger areas like thoroughfares, you will need a lighter sheet like a shower curtain.... Or a crap load of tape whichever you prefer.
For thoroughfares, this is what you're trying to achieve... minus the forklift
Once your done, you can let the room equalise under its existing AC settings before taking some measurements and giving your stakeholders a walkthrough. Personally, I've gone so far as to turn AC unit off completely to demonstrate how well it can work. Don't do this unless you know your IT loads REALLY well or really stupid. Clearly, i'm the latter.
DIY Thermal Containment
If you've managed to sell your proof of concept, now it's time to get real and luckily, I have a plan for that too.
You'll need angle brackets, self tapping screws and rolls of clear PVC anti static sheet. If you want to take your install to the next level and make it adjustable and removal, add to your list threaded pot magnets, stainless steel washers and wing nut bolts.
Start by cutting your PVC sheet to the shape you need to fill the space. Pre drill and screw the clear PVC sheet to one half of the angle brackets. Screw the brackets into the ceiling and you're done.
If you're trying to take your install to the next level, instead of screwing the brackets to the ceiling, bolt the angle brackets to the threaded pot magnets using a wing nut bolt and washers on both sides of the PVC sheet. Finally attach the entire contraption to the ceiling via the pot magnets.
What? You were expecting more? Make sure you don't cut your sheet too short. A little overhang is better than not enough. You can also heat it with a heat gun to bend it into certain shapes.
Final Thoughts
Remember that you need to be taking measurements both before and AFTER because otherwise you won't know if the changes you're making ACTUALLY WORK. Don't simply take my word for it.. take measurements and take action accordingly.
Air flow management in smaller environments has often been a point of contention. Mostly because it's very difficult to realise the benefits in smaller environments or it could be that no one other than you cares.
In this article, we'll discuss different forms of airflow management and various ways to take measurements both before and after. Let's get started.
Everything Starts With Measurements
No, not those kinds of measurements! We're talking temperature, humidity, airflow and the like.
Temperature/Humidity
Everyone usually has some form of temperature and/or humidity monitoring somewhere. This is either cabled to or inside of a PDU, a UPS or an OOB device and that's enough right? Not for us it isn't!
The first thing to determine is where to take measurements from and it's probably going to be different for every site. As a starting point, try to monitor the overall temperature within the room. You'll need a couple of sensors for this because you'll want to take an average across all of them. If you were to accidentally place a sensor in a hot or cold spot, hopefully the average will be levelled out thanks to the other probes and should keep you well enough informed until you are able to fix it.
Next you want to measure at the rack inlet. If your AC system supply air feeds in via the ceiling, you need to place your sensors at the bottom of the rack. If your supply air feeds in from the floor, you place your sensors at the top of the racks. What you're looking to find are the conditions of the server farthest away from the supply air which would then be our worst case scenario.
Next on the list is the supply outlets. Monitoring these with airflow and temperature sensors is a good idea because not only do you know the temperature of the air feeding the room but you also know if one or more are damaged (resulting in reduced airflow), have a restriction (resulting in reduced airflow) or the AC system has failed (resulting in no airflow). If you have redundant AC systems, it's critical you monitor the state of your AC units because you won't know when one of the units has failed. Yes, I've seen it happen and i've never seen the temperature skyrocket that fast before.
You could also measure the temperature of air outside of the room. That information could be used to help you determine how you cool the room. If it's colder outside of the room, you might consider opening a few doors or removing a few ceiling tiles etc.
Finally, if you're using thermal containment, you may want to do the same in your hot aisle. Personally, i'd just get some cheap mercury based wall thermometers and attach them to the wall. A hot aisle is meant to be hot, so I don't see a need to continuously monitor it especially in a smaller environment.
Now that we have figured out what we want to monitor, where the sensors should be placed and how many we need, we should probably look at some products.
There are a couple of companies who specialise in this area but one that i've been quite happy with is Geist. For a small environment, you can't go wrong with the Watchdog 1200 climate monitor. The 1RU Watchdog 1200 has a couple of built in sensors for monitoring temperature, humidity, airflow, ambient light and sound but also supports up to 16 digital sensors, 3 analogue sensors and 4 IP cameras.
Geist seem to have an unending list of sensors to connect to the system. From water sensors and door sensors to isolated voltage sensors and smoke alarms, it'll make you wonder whether the 1200 is actually enough for you.
Finally, you can go online and try out the web interface for free and even navigate a 3D view of the product. Great products and accessories coupled with the ability to test drive the system made choosing Geist easy.
Thermal Imaging
Thermal imaging is a great way to perform spot checks in your datacentre. Use it to see where your hot spots are, if circuit breakers are close to overload and check seals around doors, windows and hatches. What's best is that it doesn't have to cost thousands of dollars to do it.
Take the FLIR ONE for example which is an FLIR camera attachment for your smartphone. It's portable and BLAAAACK!!! and will provide enough resolution to help you make your next move. At roughly $250 USD you can probably justify the cost of one for yourself and occasionally take it to work when you need to.
One thing an FLIR camera cannot do is predict how airflow, temperature etc will change BEFORE you make changes which essentially leads you to making changes, checking with your FLIR camera and repeating until you get it right.
How do we avoid this? With computational fluid dynamics analysis. Strap yourselves in, because take off is going to be rough.
Computational Fluid Dynamics (CFD) Analysis
Computational Fluid Dynamics (CFD) is a technique that we utilize in datacentres to model and analyse airflow and temperature changes using tons of math! Yep, math!
As you can imagine, the people who created said math are quite expensive and let's not forget the people who have to program said math into a software package that you or I can't understand anyway. Long story short, it's an expensive piece of software. However, if you can make use of it, it's a much more powerful tool than any of the previous tools I've mentioned so far.
You can use it to determine how air will flow in and around your datacentre, discover hot and cold spots but most importantly, you can make changes like those mentioned below and measure their benefits without spending a cent!
There's a couple of options for obtaining CFD software;
Hire someone to come in and do it all for you (expect to spend a few thousand dollars)
Buy the software and do it yourself (expect to spend a few thousand dollars and many months studying)
Buy some software that kinda does most of it and bodge the rest (Expect to spend a few thousand)
Ok, so the emoji keyboard has nothing to do with airflow management but it does fairly describe the art of the bodge.
Continued in Part 2...
In part 2, we'll discuss how plastic, rubber and shower curtains are going to help you achieve your goals! Seriously...
Now that our switchboard is in place we need to get power to where it's needed the most and for the bulk of you, that's going to be server racks.
If you're reading this, I'm going to assume that Datacentre style overhead power distribution is out of your budget. This how I accomplish the same task.
Firstly, start with a good rack. One that's designed for the purpose. Using a server rack designed to house servers and manage cabling at the rear is probably not the best idea for a network patching rack which will generally have cable management at the front. After having learnt this lesson the hard way, I can't help but try to impart this knowledge onto all of you.
APC AR3100 Server Rack
Panduit S6212BF Server Rack
APC AR3340 Network Rack
Panduit CQSMDC79 Network Rack
While i love both APC and Panduit racks and accessories, i do tend to favour APC. Mostly because i always seem to be able to get my hands on their server racks with relatively short notice. As always, it's up to you what rack fits your needs but just remember, there's a little more to choosing a server rack that simply looking at its dimensions.
Overhead Power Distribution On A Budget
Now that our rack is sorted, I would normally turn my attention to overhead cable management'. The APC AR8560 cable trough connects securely to the top of the APC rack though you can get away with using this setup on other racks. These cable troughs should be Connected together allowing a single rack to be removed independently of your electrical circuits running overhead.
Have the electrician mount the power outlet boxes on the rearward facing side of the cable trough and you'll no longer need to pay an electricians call out fee whenever you need to move things around.
Just remember to mark your outlets so you can tell at a glance which electrical board they're connected to. I suggest using paint pens to colour in part of the outlet box and colour part of the electrical board cover to match. I like to use red for UPS power and blue for mains power.
Earthing
The most important part of your install should be your earthing system. It's a safety system which should never be overlooked and your plan for this system should be discussed with your electrician.
Without your direction, the electrician will run a dedicated earth from the electrical board to your server rack and use a self tapping screw and appropriate washer to earth your server rack and yes, it does work but anything beyond that will generally be your problem to deal with not theirs.
If your thinking "well, I don't know anything about this stuff" I have some suggestions below.
Piggyback Style Earthing
The piggyback style is generally going to be the cheapest. Mostly because it can be wrapped into other jobs (like running a new circuit) for relatively little labour. It also requires the least amount of additional consumables.
Despite being easy on the hip pocket, you potentially introduce additional resistance into your earthing system and by piggybacking your earth, you are creating a number of potential points of failure. Severe a link in the chain and you compromise everything that was piggybacked to it.
Not good. Let's try and float another idea shall we?
Earth Your Overhead Power Distribution System
Consider having your electrician earth your overhead power distribution system. Why you ask? Your overhead power distribution system is unlikely to be moved. If your power is also terminated here then it absolutely cannot be moved without the assistance of an electrician.
Accidents happen and by being higher up means it's less likely to be damaged by an ignorant mug like me. I don't know about you, but it seems like a safe bet.
The astute among you are probably thinking that the overhead cable management still needs to be piggybacked together so there's still a flaw isn't there? You'd be correct, however it is mitigated to a certain degree.
Finally, if you disconnect a rack (for removal) there is no risk of compromising the rest of the system.
Copper Bus Bar System
Essentially this is a long square/flat bar of copper dipped in tin to inhibit corrosion. Suppliers normally sell these in different lengths but you can also ask them to cut them down to the size you need with a variety of different hole spacing (NEMA, BICSI etc). I personally try to avoid cutting them if I can as it saves time and money.
When it comes to mounting, there are a few ways to mount them. For me, the most important thing to remember is to secure it to your overhead power distribution so the racks can still be removed independently of your bus bar.
How many you choose to install is up to you, but at the very least you'll need one per row. This will ensure your devices have a clean and solid connection to mother earth.
While your at it, you should pick up some ring terminals, a crimping tool, ground wire (min 2.5mm or 13 gauge but no more than 4mm or 11 gauge) and probably a small wire brush or sandpaper to ensure the surface is clean. You'll need to earth PDUs, UPSs, Network gear, Blade chassis etc so it's better to spend a few bucks on tools and do this part yourself.
One of the most common questions that's asked by literally no one is what's the best way to power my server room?
Over the years I've probably powered server rooms every which way you can think of and there definitely isn't a one size fits all solution to the problem.
Today, I'm going to walk you through a couple of different solutions which will hopefully make this decision just that little bit easier.
The Pay As You Grow Model
In most small scale installations an electrician is brought in, installs a circuit breaker at one end, an outlet at the other and runs some cable (generally single phase) between the two. Once he's finished, he hands you a very large bill and calls it a day.
... 250 million metres of cable? 1 bazillion hours of labour? You can scarcely believe your eyes! Surely this can't be real... But you pay it despite lamenting over the fact that you'll have to pay it again when you add another rack.
When you eventually start adding extra servers, racks, electrical circuits, switching, SAN and a blade center, you end up in one or more of the following situations:
You cannot effectively manage your energy usage efficiency ratio's
You run out of space in your electrical board for new circuits
You run out of capacity (amperage) in your electrical board
You destroy your budget due to additional, unaccounted for electrical works.
Planning Starts From The Beginning
Let's rewind the clock to when your office/server room fit out is first taking place. Actually, let's rewind the clock even further to when we're planning the electrical for the floor. It's at this time where you should be considering how the server room should be powered because in many cases, you'll only get one shot.
Ensure you share your plans with the electrician or electrical engineer at every step of the way. If not, you could end up with a bunch of standard 10 amp single phase circuits.
Going too small will not only limit your options in the future, but you also risk overloading the circuit. Conversely, going too large may limit your equipment choices down the road and put a larger dent into your pocket than you expected.
Using A Dedicated Electrical Board
If you're installing an electrical board for the entire floor, chances are they need to run a new circuit up to your floor from the meter room. If they're going to all that trouble, now might be a good time to run an additional line straight into your server room and connect it to a new electrical board.
If Joe bloe decides to switch the power off to a circuit and gets the wrong one, at least you know he's not going to be messing with your server room. Yes, I've seen this happen, by an electrician funnily enough. We can laugh about it now though.
Also, by obtaining our own dedicated feed, we can cater for much larger amount of growth than we would have been able to otherwise.
Secondary Electrical Board
The above option may not always be available to you. If that is indeed the case, I normally opt for running ONE massive three phase circuit (the bigger the better) from your existing electrical board to a shiny new electrical panel inside your server room.
You can of course mount the panel outside if you want but subsequent new runs will require more labour, more materials and will probably look ugly. Mind you, it'll probably still look ugly inside the server room but fewer people will notice.
Don't Forget The UPS!
If you have a bare wire UPS output, don't forget that a separate electrical board can also be used to distribute UPS power to your racks! Connect your UPS to the electrical board (to where mains power would normally be connected).
Just remember to use an appropriately sized electrical board. Using the same size as your mains electrical board may be overkill although I will admit, it would look perfectly symmetrical.
*ahem* Just remember, your UPS will always power less than your mains electrical board. Don't believe me? In part 2, we'll discuss overhead power distribution from the switchboard to the equipment.
We have multiple pairs of TV's in the office with each pair connected to a mac mini running xStand. They simply display a web page on each TV in full screen mode but you could use them any way you like.
We also wanted a solution that could turn itself on and off which would help reduce our energy bill. The mac mini's have the ability to set power on and power off schedules which is quite nice.
We also needed the TV's to turn on before the mac mini and turn off after the mac mini to ensure the web pages are displayed on the correct TV.
Most of the name brand TV's support auto power on/off schedules straight out of the box but it's quite a large price increase, like the kind that could be spent on a couple of USB missile launchers, or maybe parts to build a 3D printer one day.
So we picked up one of the largest (49 inch), cheapest TVs and grabbed a spare mac mini and off we went.
It worked! for a while. Some of the TV's have this stupid home screen when you power it on which can't be disabled. Every time the TV turns on, you have to press the home button to exit and that's super annoying. We'll get to fixing that later.
Obviously, there's a better way to deploy one of these setups and we believe we've found it. Bring on the BananaPro or as we've come to know them as, the DashPi.
If you're like us and only have one network port on the wall to use with your BananaPro but require two, you'll need a network switch to connect your BananaPro's to the network.
But why bother when the BananaPro supports WiFi?
Because WiFi isn't reliable enough and in production, we found that sometimes the time it took to connect to the WiFi network meant the web pages failed to load.
Cost (Time Of Writing)
Description
Typical Use Case
Purchasing Link
$29.95
USB powered network switch
If there isn't enough network ports for your BananaPro to connect to.
Why bother writing stuff up, when you can can link to a video.
Connect Everything Up
The video below is a great resource to use if you want a professional looking installation. The first 12 minutes covers everything you need to know but unlike the above, i've also written something up as well. The truth is that i remembered the video AFTER i wrote this section.
Mount the TV bracket base plate to the wall making sure it is nice and level. Luckily, the bracket we selected has a built in bubble level which makes this task quite easy.
You'll want to make sure you screw into the your wall studs. Otherwise, you might come in one morning to see your TV hanging by its cables or worse, smashed on the floor. You have been warned!
Lay down a blanket, rug or use the carpet before you remove the stand from the TV and place the TV face down against your nice, soft. You'll need to attach the wall brackets to the back of the TV.
Before you hang the TV, it's a good idea to connect your cables while you have easy access to the ports. Connect your HDMI cable to HDMI input 1 on the TV and your Micro USB to any available USB port though i prefer to connect USB cables to the most difficult to access ports first.
Take the opportunity to tidy everything up now because once this is all installed, you probably won't touch it again. Use velcro cable wrap to secure the cables where you need them to be so they don't hang down below the TV height and don't get in the way when you try to mount the TV. You could use cable ties, but you'll kick yourself when you have to make changes to your setup.
Lastly, mount the TV on the wall. You might need an extra pair of hands in order to get it done. Just remember to keep the other end of the cables you attached where you can reach them. You'll soon need to connect the BananaPro.
BananaPro Configuration
Install The Bananian OS
Next, you'll need to download the Bananian OS. I suppose you could use Ubuntu or Debian (all of which can be downloaded from the lemaker.org website) but we chose Bananian. Not sure why though.. and i don't care. I've provided a link to the download page. http://www.lemaker.org/product-bananapro-resource.html
I have managed to track down a video on installing Lubuntu. The process is essentially the same when installing Bananian.
Connect the BananaPro to the TV
Now that your MicroSD card has its operating system, go ahead and insert it into the MicroSD card slot on the BananaPro.
Connect the network cable, HDMI cable and the Micro USB cable to the BananaPro. It's probably worth connecting a keyboard and mouse as well. We'll need them to perform the final configuration on the BananaPro.
You're now ready to turn your TV on (which will also switch on your BananaPro).
Moar Applications!!
Once your operating system has loaded, open Terminal via the shortcut on your desktop. If you need to enter a username and password, try bananapi / bananapi as your username and password.
Chromium is like your normal Chrome browser. I think Google Chrome shares some kind of link to Chromium but i'm not sure... and i don't care. Moving on, we can use this to load a website or maybe a web based slide show, a youtube playlist - whatever you want.
For us, we have a web server in the office that the BananaPro's all talk to. All BananaPro's load the same page making configuration simple and the webserver uses a spreadsheet (A CSV file if you must know) to figure out what content to display based on the BananaPro's hostname. The reason we use a CSV file is to allow other's to change the contents being displayed. I seriously don't want to know every time this needs to happen.
By loading the content in an Iframe and setting a content refresh meta tag on the loader page, we can change the content being displayed in the Iframe whenever we want without having to physically interact with the BananaPro. In our case, we just wait up to 15 minutes before the loader page refreshes and the content in the iframe reloads. Cool huh?
The BananaPro, just like many other HDMI devices has the ability to send audio over the HDMI cable. We decided to take advantage of this by installing text to speech functionality and combining it with aplay (which is pre-installed) to play mp3s.
Since it's really easy to install, we'll install it right along side chromium as well as configure some Stephen Hawking like text to speech alerts using espeak.
Finally, one of the problems with the Soniq TV's is the fact they come with this stupid home screen which can't be disabled. Every time you turn on the TV, there it is and it requires a button press on the remote to get rid of. Let's take care of this as well using lirc.
Install chromium, espeak, mpg123 and lirc
When you run the following in a terminal window, you'll be asked for a password. If you haven't changed your password, this will still be bananapi. Once you've successfully entered your password, apt-get will install the necessary applications.
When you dump the following into an open terminal, you'll configure Chromium to load at startup and go straight into Kiosk mode displaying whatever page you tell it to display.
It will also disable any power saving functions like the screensaver.
Remote Controlled Crontab (Scheduled Tasks)
Early on we realised that we'd be asked to create recurring notifications. Obviously, we would use cron to automate this task but when you have 50 million of these buggers floating around, you really don't want to log into every single one of them to make them say "Home time!" at 6pm, Monday to Friday.
Enter remote controlled crontab...
Remote controlled crontab uses one crontab entry, generally deployed during initial configuration of the BananaPro. This cron entry calls a PHP file on a webserver somewhere. In return, the webserver responds with crontab which is then saved to /etc/cron.d/remote_cron. The contents of the BananaPro's crontab is dependant on the its hostname.
Why not just add the entries to /etc/crontab? Because if you break this process (which you probably will), you could destroy /etc/crontab which includes the only crontab entry which is capable of fixing your mistake. Using this system, if you mess up your crontab, the only file you'll destroy is /etc/cron.d/remote_cron but as you'll see soon enough you'll be able to fix it.
This guide won't go through how to set up a linux webserver with PHP installed but once you have done so, you'll need to create the following PHP file in the webservers' document root.
This file simply figures out the hostname of the BananaPro that's trying to talk to it, then opens a file on the webserver using the hostname as its key before returning the contents of that file. Sure, we could have written this code a little better but it's here, so you can do that if you want.
With that done, it's time to give our host a task to execute on a regular basis. How bout some audio notifications and an automated shutdown?
Audio Notifications
We also copied an mp3 which plays a couple of bells before the text to speech kicks in. We'll use mpg123 to play the bells followed by a text to speech notification using espeak.
sdfsdfjsdf
Automated Shutdown
Finally, we need to tell the BananaPro to shutdown overnight. To be honest, it's probably not that necessary given how little current the BananaPro's draw but we're paying for it and there's no need for it so let's tell it to shutdown once the majority of people have gone home for the night.
We could also turn the TV off, which would cut the power to the USB port shutting off the BananaPro. However, because we're cool we'll shut it down via crontab.
USB IR Blaster
Finally, we'll connect a USB IR Blaster between the BananaPro and the TV. This will be used to send certain TV remote signals to the TV to exit the stupid Soniq home screen and ensure the HDMI1 input is selected.
To be honest, this part is a PITA. Surely, there's a better way to do this...